
Hard Holiday How-Tos
 Whether this is your first time preparing Thanksgiving dinner or your 20th, planning for and executing a holiday meal without a glitch can be tough, particularly when you have an eager audience. We understand these challenges and hereby offer up Thanksgiving 101 basics for first-timers, plus some new Thanksgiving 201 spins on favorite flavors for those who have successfully survived a holiday or two. Here are a few ideas to help make your Turkey Day flow smoothly and taste delicious.
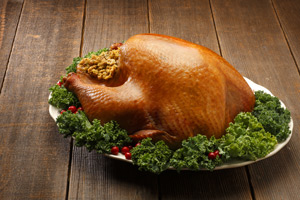
Turkey Carving 101:
Once you have taken your roasted turkey out of the oven, give it a chance to rest to allow the juices to settle while you make sure you have the proper tools: a sharp, smooth-edged knife, a carving fork, a sturdy cutting board, and steady hands. Then proceed with Good Housekeeping's four easy-to-follow quick steps:
- Remove stuffing (if you stuffed the cavity of the turkey with dressing). Grasp a drumstick. Place a long carving knife between the thigh and body and cut through to the joint. Pull the leg outward and disjoint it with your knife's point. Separate the thigh from the drumstick; put pieces on platter.
- To remove breast: insert a fork into the opposite side of the bird to steady it. Holding your knife parallel to the cutting board, with front (wishbone) end toward you, make a long cut just above the wing joint through to the body frame.
- Positioning your knife tip at the front (wishbone) end, use the blade to cut straight down along the side of breastbone to release the breast half from the body. Now is a good time to cut off the wings and separate them into sections.
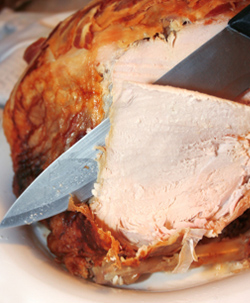
- Place breast, skin side up, on cutting board and slice meat diagonally across breast into 1/4-inch-thick slices. Put slices on platter. Repeat entire process with leg and breast on other side.
There are many excellent videos to follow online, including one from the Culinary Institute of America for a great visual step-by-step guide to the entire carving process.
Turkey Carving 201:
If you've already mastered turkey carving, you might want to tackle spatchcocking the bird. While this process of removing the breastbone and removing and/or crushing the breastbone takes a few extra steps during preparation, it yields a flattened turkey that will cook more evenly and in a third less time than the giant football that usually fills your oven. If you're ready for a new challenge, check out Martha Stewart's website for more detailed instructions, or Jack Burton's directions.
Sweet Potatoes 101:
You don't have to top sweet potatoes with marshmallow, crushed pecans, and brown sugar to enjoy the full flavors of this low-calorie, fat-free tuber that's filled with Vitamin C, fiber, and potassium. We swear: they're delicious even when prepared minimally, with all their natural sweetness, in a traditional bake or mash.
No matter how you decide to prepare your potatoes, be certain to wash and scrub them thoroughly prior to cooking.
To bake sweet potatoes: Preheat the oven to 400°F. Prick the skin with a fork several times. Place the sweet potatoes on a cookie sheet, preferably lined with foil for easy clean-up, as they occasionally ooze during baking. Place the cookie sheet in the oven and bake for 30 to 50 minutes or until cooked through. Serve as hot or cold, whole or mashed, solo or with butter, a sprinkle of chopped and toasted walnuts or pecans, a couple of shakes of cinnamon, or a drizzle of honey or maple syrup.
To mash these delicious 'taters, you can either bake or boil them first. To boil sweet potatoes: Boil for about 30 minutes, or until tender when pierced with a fork. Drain, peel, and cut into quarters, then mash with a potato masher, run through a potato ricer or food mill, or mash with forks if those are the only tools you have handy. Serve plain or topped with butter, salt, and pepper.
TLC offers great recipes for this tasty treat. Or if you want to go the really easy route, check out the selection of Alexia products in the Sprouts freezer case, including Sweet Potato Puffs and Spicy Sweet Potato Fries.
Sweet Potatoes 201:
Add an exciting new flavor profile to your holiday menu by grilling sweet potatoes with this recipe from TLC: First, fire up your grill and consider adding apple wood or mesquite wood chips to the charcoal for optimal flavor. Cut your potato into round slices and brush each with olive oil. Place them on the grill, then turn them 90 degrees after about eight minutes to get those attractive cross-hatch grill marks. Flip and repeat on the other side. Check for tenderness; the cooking time depends on how thickly you've sliced the sweet potato rounds.
We also love the quick Sweet Potato Biscuits from Paula Deen — after all, who else would you trust to create a fantastic biscuit recipe more than a butter-lovin' Southern cook? These biscuits have been featured on our Thanksgiving tables for years — they're especially scrumptious when paired with a spreadable compound honey-orange or honey-cinnamon butter. Try this recipe from the Food Network or this one from Ina Garten.
Sweet Potato Biscuits by Paula Deen
Ingredients:1 1/4 cups all-purpose flour
2 heaping Tbsp. sugar
4 tsp. baking powder
1/2 tsp. salt
3/4 cup mashed cooked sweet potatoes
1/4 cup (1/2 stick) softened butter
2 to 4 Tbsp. milk (depending on the moisture of the potatoes)
Preheat the oven to 450°F.
Sift together flour, sugar, baking powder and salt. In a separate, large bowl, mix the sweet potatoes and butter. Add the flour mixture to the potato mixture and mix to make a soft dough. Then add milk a tablespoon at a time to mixture and continue to cut in. Turn the dough out onto a floured board and toss lightly until the outside of the dough looks smooth. Roll the dough out to 1/2-inch thick and cut with a biscuit cutter. Place the biscuits on a greased pan and coat tops with melted butter. Bake for about 15 minutes. (Watch your oven: If the biscuits are browning too fast, lower the temperature.)
Orange Honey Butter by Paula Deen
Ingredients:1 stick butter, softened
1/3 to 1/2 cup honey
Shredded orange zest
Mixed nuts
Mix a stick of butter with honey in a medium sized bowl. Add orange zest and mixed nuts, to taste. Mix again and serve.
Cinnamon Honey Butter by Ina Garten
Ingredients:1/4 pound unsalted butter, at room temperature
3 tablespoons good honey
1/4 teaspoon ground cinnamon
1/8 teaspoon Kosher salt
Combine the butter, honey, cinnamon, and salt in the bowl of an electric mixer fitted with the paddle attachment. Serve at room temperature.
Cranberries 101:
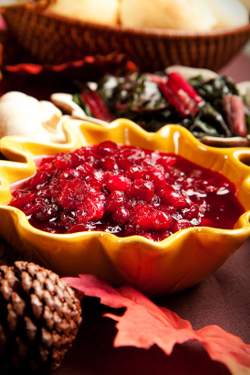 Lush ruby-red cranberries are practically synonymous with Thanksgiving. Whether you prefer jelly or relish, basic cranberry preparation is even easier with quick cooking tips. And hey, the easy recipes on the back of that 12-ounce bag of fresh cranberries are pretty great! But in case you accidentally pitched that bag before you started cooking, here's a simple recipe for fresh, chunky cranberry sauce from LiveStrong.com.
Wash the berries in cold water. Discard any that are overly soft, wrinkled or damaged in any way.
Mix 1 cup water with 1/2 cup orange juice in a saucepan. Bring the mixture to a boil.
Dissolve the sugar in the boiling water. Add the cranberries to the sugar water.
Boil the cranberries for approximately 10 minutes, stirring occasionally so they don't burn on the bottom of the pan. The cranberries are done when their skins begin to crack and the sugar water begins to thicken.
Pour the cranberries into a serving or food storage bowl. Allow them to cool to room temperature before serving or storing. The sauce gels around the berries as it cools. If you prefer cranberry jelly without the whole berries, mash the berries after cooking while they are still hot.
And here are a few fun cranberry recipes that are good for nibbling or sipping all year long.
Cranberries 201:
While we're certainly not suggesting you forgo the classic cranberry sauce on your holiday table, we wonder if you have ever tried Sugared Cranberries? This Cooking Light recipe yields tart-sweet berries that pop in your mouth and are ideal for snacks or garnishes. Be sure to save the reserved cranberry cooking syrup to use as a cocktail mixer — it yields a magnificent martini when shaken with vodka!
Ingredients:2 cups granulated sugar
2 cups water
2 cups fresh cranberries
3/4 cup superfine sugar (If you can't find superfine sugar, make your own by processing granulated sugar in a food processor for a minute.)
Combine granulated sugar and water in a small saucepan over low heat, stirring mixture until sugar dissolves. Bring to a simmer; remove from heat. (Do not boil or the cranberries may pop when added.) Stir in cranberries; pour mixture into a bowl. Cover and refrigerate 8 hours or overnight.
Drain cranberries in a colander over a bowl, reserving steeping liquid, if desired. Place superfine sugar in a shallow dish. Add the cranberries, rolling to coat with sugar. Spread sugared cranberries in a single layer on a baking sheet; let stand at room temperature 1 hour or until dry.
Note: The steeping liquid clings to the berries and helps the sugar adhere. Store in an airtight container in a cool place for up to a week. Yield: 9 servings (serving size: about 1/3 cup).
Parsnips 101:
Like sweet potatoes, one pound of parsnips can be scrubbed clean, peeled lightly (if desired), then baked at 350°F for 35-40 minutes or cooked in a small amount of simmering water for 10-30 minutes, or until tender. Once cooked, they can be enjoyed whole, diced, mashed, or in soups. Consider topping them with horseradish, caraway seeds, cardamom, ginger, nutmeg, or an orange glaze to boost flavor.
Parsnips 201:
Miraval Arizona Resort and Spa in Tucson, Arizona serves up a wonderfully flavorful, low-fat soup that makes guests and diners swoon. If your guests won't miss a parsnip side dish, consider this easy alternative that evokes the flavors of autumn. This soup could be served up in shot glasses or small mugs.
Ingredients:1/4 tsp. extra-virgin olive oil
2 cups yellow onions, chopped (approximately 2 large)
9 cups parsnips, chopped and peeled (approximately 4 1/2 lbs.)
4 cups pears, chopped and peeled (approximately 6 medium)
3 cups potatoes, diced and peeled
8-9 cups vegetable stock
1 tsp. nutmeg, freshly grated
2 tsp. fresh thyme
1 tsp. sea salt
1/2 tsp. white pepper
Heat the olive oil in a medium saucepot over medium-high heat. Add the onions, parsnips, pears, and potatoes. Cook until the onions have softened, approximately 2 minutes. Add the stock and bring to a boil. Reduce heat and simmer until parsnips and potatoes are soft, approximately 15-20 minutes. While the soup is simmering, stir in the nutmeg and thyme to blend the flavors into the soup.
Carefully ladle the soup into a blender and blend until smooth. Strain the soup through a fine-mesh strainer or a colander lined with cheesecloth to remove any pulp. Return the strained soup to a pan and heat until hot. Season with salt and pepper.
YIELD: 8 servings
Pie Crusts 101:
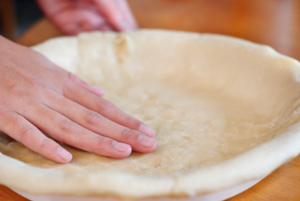 Thanksgiving isn't over until the pumpkin pie has been topped with whipped cream. If you are making your first pie crust from scratch, consider these tips:
- Use very cold butter. Starting with very cold butter makes it easier to prevent over-working the butter into the dough. Small blobs of butter will melt and become pockets during the baking process, ensuring a pleasantly flaky crust.
- Add the liquid sparingly. Add just enough liquid so the dough holds together when pinched between your fingers.
- Use plenty of flour. The more flour you have on your hands, work surface, and rolling pin, the easier it will be to shape and roll your dough.
- Keep it cool. Chill your dough for at least 30 minutes prior to rolling it. And cover and chill your pan and crust prior to filling to help keep its shape and size during baking.
Try this simple crust recipe from SimplyRecipes.com
Pie Crusts 201:
One of our friends who serves up some of the best fruit-filled pies we've ever tasted confessed that the secret ingredient in her tender pie crust is vinegar — yes, white vinegar! Another friend swears by the addition of one tablespoon of vodka. But might we suggest interpreting pie crust in a whole new way and combining the pie and the "a la mode" together in one bowl? Whip up your own apple pie ice cream then add chunks of pie crust! If you own an ice cream maker, you could start by making your favorite recipe for vanilla or caramel ice cream (try this one from David Lebovitz)... or go the easy route and pick up some Talenti Toasted Almond Gelato or Ben and Jerry's Vanilla Ice Cream from the Sprouts freezer case, then top with homemade or canned apple pie filling or chunky applesauce and chopped-up, bite-sized pieces of your home-baked pie crust (or crumbled pieces from a pre-made crust that you've baked off, such as Wholly Wholesome Bake at Home Organic Whole Wheat Pie Shells). Serve with whipped cream.

11811 N. Tatum Boulevard, Suite 2400
Phoenix, AZ 85028